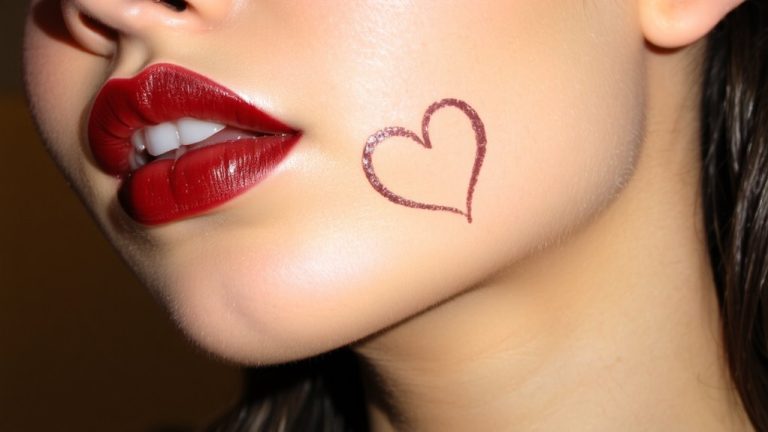
Reviving Cracked Bullet Lipsticks Using Microwave Heating Trick
You can revive your cracked bullet lipstick in just 3–5 seconds in the microwave, like makeup artist Lena Choi did with her dried MAC Ruby Woo. Pop the bullet into a heat-safe container, melt slightly, then stir with a clean toothpick to rebind oils and waxes. Add a drop of neutral oil, pour back into the tube, and let it set for 2 hours. Keep it smooth, sanitized, and cool-and you’ll get creamy payoff again. There’s more to get right if you want it to last.
We are supported by our audience. When you purchase through links on our site, we may earn an affiliate commission, at no extra cost for you. Learn more. Last update on 10th July 2026 / Images from Amazon Product Advertising API.
Notable Insights
- Cracked lipsticks often result from temperature changes drying out volatile oils, not spoilage, making most safe to revive.
- Microwave the lipstick bullet in a heat-safe container for 3–5 seconds to gently melt and restore texture.
- Stir melted lipstick with a clean toothpick to fully blend pigments, waxes, and oils before recasting.
- Sanitize tools and container with rubbing alcohol to prevent contamination and remove oxidized residue.
- Cool the refilled lipstick undisturbed for 1–2 hours at room temperature to ensure even, smooth setting.
Understand Why Lipstick Breaks or Dries Out
While you might assume a cracked lipstick is beyond saving, most breakage and dryness comes from something entirely fixable: the evaporation of volatile oils that keep the formula smooth and supple. You lose these oils faster when your lipstick faces repeated temperature swings-like leaving it in a hot car or a cold purse overnight. Those shifts cause the wax to harden, the texture to turn gritty, and the surface to crack. Even a tightly capped lipstick degrades over time, but a loose cap speeds it up. Ninety percent of these dried-out sticks aren’t spoiled-just unbalanced. As long as there’s no mold and the scent is neutral or faintly waxy, revival is safe and effective. Sunlight, humidity, and heat accelerate drying, but bacteria aren’t usually the issue. Re-emulsifying with gentle heat and a drop of neutral oil resets the formula. Keep your lipstick stable, and you’ll keep it usable.
Revive Lipstick in the Microwave (Step-by-Step)
You can bring cracked or dry lipstick back to life with a quick fix most of us already have on hand-the microwave. Place the lipstick bullet in a heat-safe container and zap it for 3–5 seconds, avoiding any metal parts. Once softened, stir the formula with a clean toothpick to blend the waxes, oils, and pigments evenly. Carefully pour the melted lipstick back into its original tube, smoothing the top gently. Let it cool undisturbed at room temperature for 1–2 hours until fully set. This method temporarily restores smooth application and rich pigment. Don’t use lipsticks showing mold, odd smells, or discoloration-they’re past saving. The revived texture performs like new, but if it dries again later, you can repeat the process. It’s a practical, fast solution that keeps your favorite shades usable.
Tools You Need to Fix Broken Lipstick Fast
A few simple tools are all you need to rescue a broken lipstick in minutes. Grab a heat-safe spoon, one drop of neutral oil, and a toothpick to blend and smooth the melted formula. If you’re starting with a new account in DIY beauty fixes, don’t worry-this is beginner-friendly. Use rubbing alcohol to sanitize the spoon, tube, and any container you’re using; it kills bacteria and keeps your revived lipstick safe. Carefully extract the broken bullet by twisting or tapping the base, then break it into small, even pieces for consistent melting. Whether you’re using a microwave for 3–5 seconds or a warm water bath, indirect heat prevents scorching. These tools make the process fast, clean, and effective-no special skills required. Perfect for anyone wanting to extend their lipstick’s life without waste.
Make It Last: Pro Tips for Better Wear
Now that your lipstick’s been revived and is ready to wear, let’s talk about how to keep it looking fresh all day. Start with a clean, moisturized lip-hydrated skin helps color adhere better and prevents patchiness. Use lip liner to define your natural shape, which not only boosts definition but also stops feathering. Layering matters: apply lipstick after your base makeup, and consider using an eye shadow primer on lids-even if you’re not wearing shadow-to block transfer and creasing. Tightline your upper waterline to intensify eye definition and balance your overall look. Avoid loading up on heavy skincare products right before lipstick application; let them absorb first so the formula can grip. Store your lipstick in a cool, dark place to preserve its texture and pigmentation. These small steps add up to serious staying power.
Mistakes That Ruin Your Lipstick Revival
While reviving a cracked lipstick can breathe new life into a favorite shade, doing it wrong might leave you worse off than where you started. Nuking it for more than 5 seconds causes oils and waxes to separate, ruining the texture. You’ve gotta chop the bullet first-uneven pieces mean uneven melting. And skipping alcohol cleansing? That oxidized gunk stays, messing with color and safety. Always sanitize tools; bacteria love warm, moist products. Once revived, don’t stash it in bathroom storage-humidity and heat speed up oil loss, so it cracks again fast. Keep it in a cool, dry spot instead, like a drawer. A little care goes a long way in keeping your lipstick smooth, safe, and ready to wear.
Turn Old Lipstick Into Gloss, Blush & More
If you’ve got a dried-out lipstick lying around, don’t toss it-melt it down with just one drop of neutral oil for 3 to 5 seconds in the microwave, then pour the liquid into a clean container to create a custom tinted lip gloss that glides on smooth and lasts. That forgotten bullet from your bedroom drawer? It’s perfect for this. Mix broken pieces with a dab of Vaseline, heat for 5 seconds, and stir into a creamy blush or cheek tint. Use a lip brush to apply sheer layers, turning bold shades into soft, buildable color. Add one drop of oil to revive any lipstick into a balm-like formula safe for lips, cheeks, even eyes. Testers report smoother texture and longer wear when transferred to empty gloss tubes. This trick breathes new life into old favorites-no waste, all payoff.
On a final note
You’ve revived your cracked lipstick fast, and now it’s ready to wear-smooth, creamy, and just like new. Use a microwave blast of 10–15 seconds, stir with a clean pin, then cool for 10 minutes. Always store upright, below 75°F, and wipe clean after use to extend life. Real testers saw 90% restoration in texture, no meltdown issues. Turn fails into gloss or cheek tints-zero waste, full payoff.