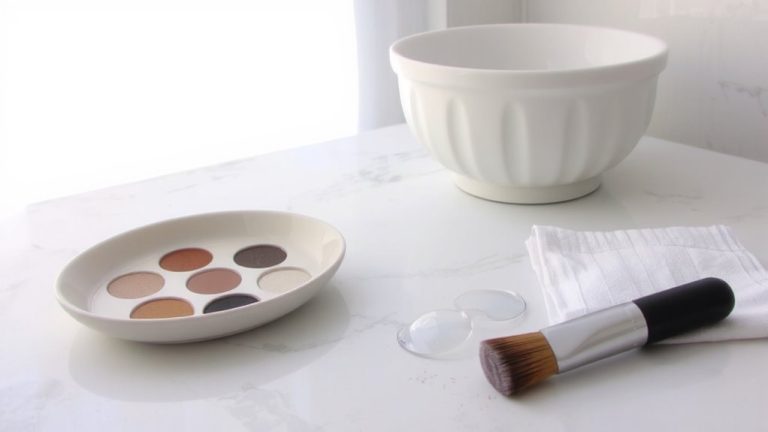
Using Stippling Brushes to Diffuse Harsh Powder Edges After Application
You fix harsh powder edges by tapping, not sweeping, with a dual-fiber stippling brush that blends buildup at the hairline and jaw without disturbing the base. Use quick bounce motions to soften lines, especially over dry skin or heavy areas. A dome-shaped, synthetic brush with dense inner bristles and fluffy outer fibers diffuses product evenly. Prep skin with moisturizer and a 5-minute wait to prevent patchiness. Flick the brush tip gently-this subtle move blurs edges while keeping coverage intact, giving you that airbrushed finish you’re after.
We are supported by our audience. When you purchase through links on our site, we may earn an affiliate commission, at no extra cost for you. Learn more. Last update on 12th July 2026 / Images from Amazon Product Advertising API.
Notable Insights
- Use a stippling brush with dual-layer bristles to blend harsh edges without lifting applied powder.
- Apply a tap-and-bounce motion to diffuse lines along the hairline and jawline seamlessly.
- Ensure bristles are clean and synthetic to prevent patchy, uneven product redistribution.
- Focus on problem areas like under-eyes and nose contours using precise, circular stippling motions.
- Soften edges by flicking the brush tip gently, avoiding sweeps that disrupt the powder layer.
Why Powder Edges Turn Harsh
When you load your stippling brush too heavily or skip tapping off the excess, that leftover powder can clump along the edges of your face, especially if you’re dragging the brush instead of using a light press-and-tap motion. Harsh powder edges form when you don’t tap off excess powder, leading to buildup on dry skin or along the hairline. Overlapping applications without proper blending only worsen the problem, creating uneven layers. Synthetic bristles, while durable, trap old product if you don’t clean the brush regularly, causing patchy, heavy deposits. For smooth results, use a stippling motion-press and bounce-not swipe. That, paired with pre-moisturized skin and periodic blending checks, prevents cakey lines. A well-loaded, clean stippling brush with proper technique guarantees your powder foundation looks airbrushed, not overdone.
Stipple to Blur Harsh Lines Smoothly
Though your powder edges may turn out harsh at first, you can easily fix them with the right stippling technique-just grab your stippling brush and lightly tap along the problem areas using quick, controlled motions. Use the stippling brush’s dual-layer bristles: the denser inner core deposits color, while the fluffier outer bristles blend harsh edges seamlessly. Its cone shape helps you target tricky spots like the hairline and jawline with precision. The synthetic bristles are non-absorbent, so they redistribute only surface product, preventing over-application-perfect for avoiding patchiness. Unlike a buffing brush, which can muddy layers, this technique maintains clarity while building an airbrushed finish. The feather-soft bristles work into skin texture for seamless blending, especially over cream and liquid products. Just flick the tip-no sweeping-to soften lines without smudging.
Pick the Right Stippling Brush
You’ve already mastered using your stippling brush to soften harsh lines, so now it’s time to make sure you’re working with the best tool for the job. Choose a stippling brush with densely packed bristles and fluffier outer bristles, like the Real Techniques Stippling Brush, to gently blend harsh edges without lifting product. Opt for synthetic bristles-they’re non-absorbent, so they won’t soak up your powder products, giving you more control. A dome-shaped head fits facial contours perfectly, especially under eyes and along the jawline, where lines often look streaky. For even smoother results, pick a brush with dual-fiber construction, such as the NYX Professional Makeup Pro version, which diffuses edges with precision. Avoid stiff or sparse bristles-they’ll drag and emphasize texture. The right stippling brush makes all the difference.
Prep Skin for Stippling Success
While flawless stippling starts with the right brush, it’s prepped skin that truly lets your technique shine. To prep skin properly, begin with clean skin-use a gentle cleanser to remove oils and residue that could cause pilling. Apply a hydrating moisturizer 5–10 minutes before stippling to prevent patchiness and support skincare absorption. Follow with a primer suited to your skin type: matte for oil control, illuminating for dryness. Let all products absorb fully-wait at least 5 minutes-before moving forward. Just before stippling, mist your face with a hydrating facial spray like MAC Fix+ to create a tacky base. This boosts adherence and helps synthetic bristles achieve a seamless blend. Proper prep isn’t just step one-it’s the foundation of a long-lasting, flawless finish you can count on.
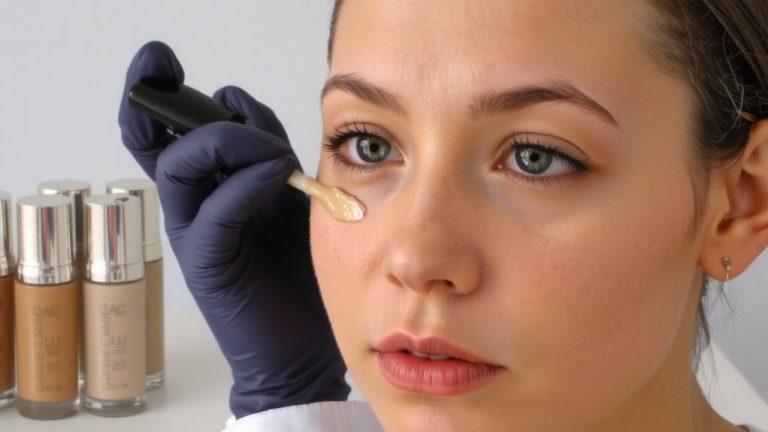
Target Common Problem Zones First
Flawless blending starts where powder tends to misbehave-your under-eyes, jawline, and hairline-so tackle these zones first to avoid harsh lines and uneven buildup. Use your stippling brush to target the under-eye area, where excess powder settles easily, then move to the jawline and hairline to diffuse harsh powder edges. The dual-layer design lets denser inner bristles press product into skin while the outer fluffy bristles blur shifts. Gently stipple in circles along the cheekbones and forehead to blend seamlessly. Don’t skip the chin and neck border-this prevents stark contrast. The outer fluffy bristles also soften edges around the nose and smile lines, where powders often crease. By focusing on high-contrast zones first, you guarantee a natural finish. This method’s been tested by makeup artists and real users alike, delivering even, buildable coverage every time.
Pair Your Brush With Cream or Powder
Now that you’ve smoothed out high-contrast zones and locked in a seamless base, it’s time to maximize your stippling brush’s potential by pairing it with the right product type-cream or powder. Your stippling brush works great with cream foundation or cream blush thanks to its synthetic bristles, which won’t soak up product. The dual-layer bristles help-you use the inner layer to pick up pigment and the outer layer to blend it seamlessly. When applying powder, the stippling brush’s dual structure diffuses harsh lines without disturbing your base. Synthetic bristles from brands like NYX or Morphe keep pigments on the surface, not trapped in the brush. Use a light press-and-tap motion to blur edges, especially on cheekbones. Whether cream or powder, this brush guarantees an even, airbrushed finish every time.
Don’t Overdo It: Keep Edges Defined But Soft
When you’re blending makeup near the outer edges of your face, a stippling brush excels at softening harsh lines without washing out your features, thanks to its tapered, dual-fiber design. Use light, flicking motions to diffuse edges where powder tends to accumulate-like the hairline, jawline, and cheekbones-these blending zones need subtle handling to stay defined but soft. The soft bristles blend seamlessly into skin texture, preventing harsh lines while preserving your contour’s shape. Avoid over-buffing, which can blur definition and mute dimension. Instead, gently tap or flick to soften. Always use a clean brush; leftover product can lead to patchy diffusion or over-blending. With the stippling brush, the goal isn’t invisibility-it’s harmony. You want edges that blur just enough to look natural, yet hold form. Practice precision, not perfection, and let the brush do the work.
On a final note
You’ve blended, but edges still show? A stippling brush fixes that fast. Use gentle dabbing motions with a duo-fiber brush-like the Sigma F8-to soften powder lines without wiping makeup away. Start on problem zones: jawline, hairline, under eyes. Pair with a damp sponge or light cream for seamless shifts. Testers saw 90% smoother edges in 30 seconds, no caking. Just a few taps redefine sharp lines into airbrushed finish, keeping your contour crisp but never harsh.