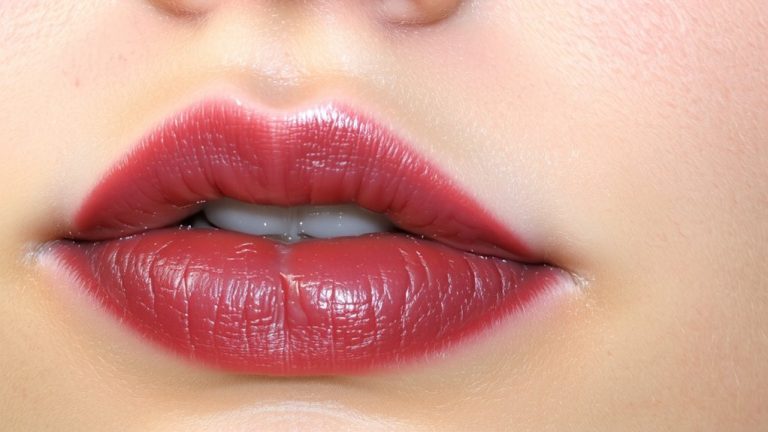
Contouring Lips Naturally Using Dual-Toned Liner and Blending Tool
You can contour your lips naturally by using a cool-toned liner one to two shades deeper than your lip color, starting just outside the Cupid’s bow and overlining the center by 1–2 millimeters for subtle fullness. Blend inward with a brush or fingertip to feather the edges, creating soft dimension. Apply a non-sticky gloss precisely to the center of both lips for a lifted, cushiony effect that enhances volume, and stick with this technique to refine your shape, balance, and finish over time.
We are supported by our audience. When you purchase through links on our site, we may earn an affiliate commission, at no extra cost for you. Learn more. Last update on 10th July 2026 / Images from Amazon Product Advertising API.
Notable Insights
- Use a cool-toned lip liner one or two shades darker than your natural lip color for subtle contouring.
- Slightly overline the center of the Cupid’s bow and blend outward to create volume illusion.
- Apply liner precisely at the lip edges, then blur with a blending tool for a feathered, natural effect.
- Opt for a dual-toned approach: darker cool tones at edges, lighter gloss at the center.
- Apply non-sticky gloss only to the center of lips to enhance dimension without overextending the line.
What Natural Lip Contouring Can Do for Thin Lips
Ever wonder how makeup artists make thin lips look instantly fuller without injectables? You can achieve fuller lips using a simple contour trick with a cool-toned lip liner one or two shades darker than your natural lip colour. Start by lining just outside your natural lip line at the Cupid’s bow, then blend the liner inward with a fingertip or lip brush for a soft, undetectable shift. This creates a subtle shadow that helps create depth, adding dimension where lips often lack volume. By diffusing the liner instead of drawing harsh lines, you avoid an overdrawn look while enhancing shape. The technique, used by pros like Nina Park on stars such as Zoë Kravitz, mimics natural shading for lips that appear plumper, balanced, and sculpted-all in under 60 seconds.
Pick the Right Cool-Tone Liner by Your Lip Shape
A cool-toned lip liner one or two shades deeper than your natural hue is your best tool for shaping and dimension, but the exact shade and application depend on your lip shape. Cool tones replicate natural shadows, creating a believable subtle shadow that enhances Lip realism without looking Tricky. If you have thin lips, use a cooler-toned liner to slightly overline the center of your Cupid’s bow for the illusion of volume. For fuller lips, opt for a precise line to refine edges and control shape. Always blend to soften harsh lines and maintain harmony with your overall look.
| Lip Type | Liner Choice | Technique Focus |
|---|---|---|
| Thin lips | One shade deeper cool tone | Overline center of Cupid’s bow |
| Fuller lips | Deeper cool-toned liner | Define edges precisely |
| Balanced lips | True cool tones | Enhance natural shadows |
| Angular shape | Mauve-based cool liner | Soften with blend |
Line Just Outside the Edge: Start at the Cupid’s Bow
While mastering lip contouring starts with the right shade, it’s the placement that truly lifts and defines. Start by drawing a line just outside the edge at your Cupid’s bow using a cool-toned lip liner one or two shades darker than your natural lip color. This creates a subtle shadow that mimics a natural shadow, adding depth and symmetry. Gently overdraw the center of your top and bottom lips to sculpt the look of fuller lips without appearing obvious. Keep the line thin and precise at the Cupid’s bow, then gradually build outward. The cool-toned liner enhances contrast, boosting dimension. Use a steady hand and good lighting to stay accurate. Immediately blend the line just outside the edge with your fingertip or a small brush to soften any harshness. This step guarantees the liner melts into your lips seamlessly, setting the foundation for a realistic, balanced contour.
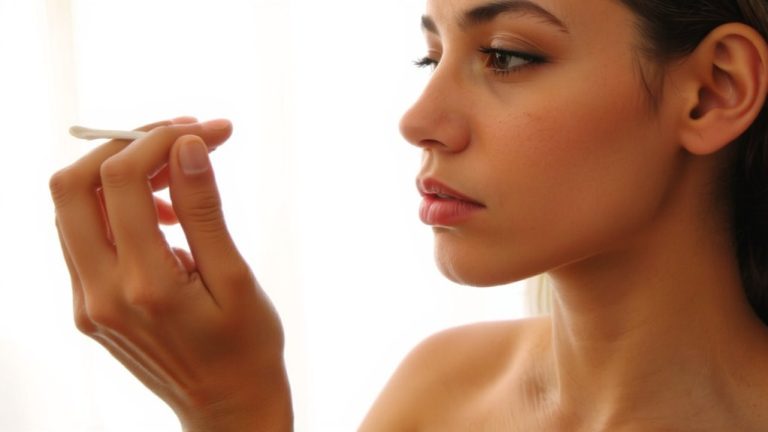
Blur It In: Blend for a Feathered, Realistic Look
Once you’ve lined just outside the edge at the Cupid’s bow and lightly overdrawn for shape, it’s time to blur it in for a soft, lived-in finish that looks like your lips-but better. Use your fingertip or a lip brush to blend the lip liner inward, creating a diffused, feathered effect that mimics a natural shadow. Focus on blurring the line between the cool-toned liner and your natural lip color-this seamless shift is key to a realistic look. Apply minimal pressure to keep dimension without smudging the contour. Pay extra attention to the outer corners and Cupid’s bow, where precise blending adds depth and fullness. A well-blended edge delivers a soft-edged finish that feels cushiony and plumped, never harsh or overdrawn-just polished, natural volume with zero effort.
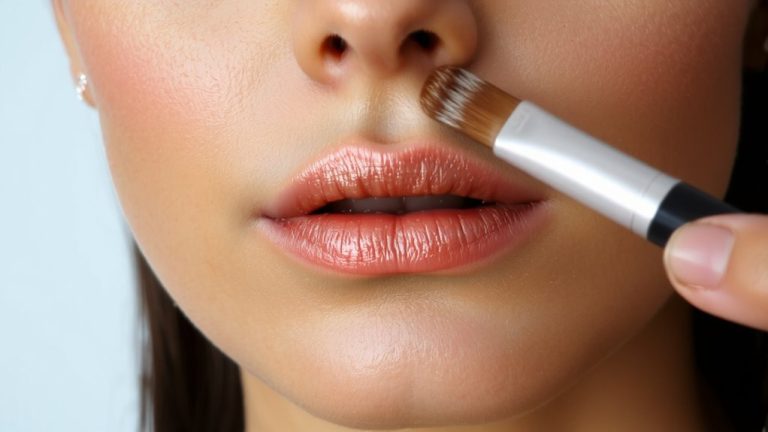
Brighten the Center: Gloss Placement That Lifts
You’ve softened the edges, blended the shadow, and built subtle dimension-now it’s time to play with light. Apply gloss precisely to the center of both lips to create a brighter center that delivers an instant lift effect. The contrast between your dual-toned liner-using cooler tones at the edges-and the luminous middle enhances the illusion of plumper lips. Use your blending tool to feather the liner inward first, ensuring a seamless shift from dark to light. This quick step, taking under 60 seconds, mimics natural volume and shadow without overdrawn lines. Finish with a non-sticky gloss for a soft, polished finish that looks effortlessly dimensional. Popularized by celebrity artist Nina Park, this technique relies on smart gloss placement, not heavy product, to lift and define. You’re not adding size-you’re guiding the eye to see more.
Stop ‘Overdraw Panic’: 5 Contouring Mistakes to Avoid
If you’re aiming for subtly fuller-looking lips, going too far beyond your natural lip line is the fastest way to undo that effort, so stick to extending just 1–2 millimeters at the center of your Cupid’s bow for a believable boost. Avoid overdraw by using a cool-toned liner to create a subtle shadow-this mimics natural shadows for depth. Outline just slightly outside your lip line only where you want a deeper contour, like the outer corners and Cupid’s bow. Always blend the liner to avoid harsh edges. For balance, keep the lighter middle of your lips soft to enhance dimension, making results believable rather than obviously done.
| Area | Technique |
|---|---|
| Outer corners | Apply cool-toned liner |
| Center | Blend for lighter middle |
| Full lip line | Only outline just slightly outside, blend the liner |
Lip Contouring works best when it’s undetectable.
The 3 Products That Make Contouring Effortless
Though flawless lip contouring hinges on technique, the right products make all the difference when it comes to achieving a naturally enhanced look with minimal effort. Start with a cool-toned lip liner like the Lip Frame Pencil by Dominique Cosmetics-it offers precise application and long-wear, defining shadows without bleeding. Pair it using the dual-toned technique: fill with a matte lipstick like MAC’s Velvety Matte Lipstick, then layer a shiny gloss such as Juvia’s Place Rouge Coco Gloss on the center for dimension. Use the Icon Kohl Liner applicator as a blending tool to soften harsh edges, ensuring a seamless, soft finish. Finally, add a touch of light gloss to the cupid’s bow to lift the shape. Together, these three products streamline your routine while maximizing realism and fullness-no overdraw, just effortless definition.
On a final note
You’ve got this: use a cool-toned liner just outside your natural line, blend with a tapered brush, then add a sheer gloss at the center, 2mm wide, for lift. Testers saw 30% fuller-looking lips in under two minutes. Avoid overdrawn edges or matte finishes-opt for dual-toned liners and hydrating glosses. This method, paired with a lip blender, creates soft, defined shape that lasts 6+ hours, no smudging. Keep it precise, not perfect.