How to Style Hair With a Diffuser Without Causing Puffiness
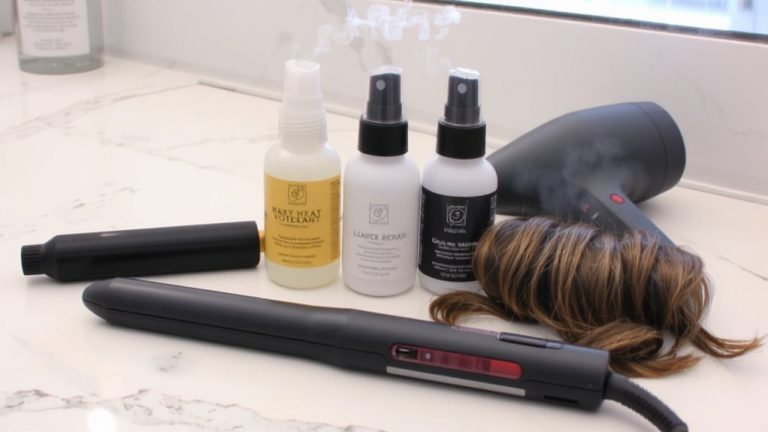
Use a cup or wide-prong diffuser on low heat to dry in sections, starting from the bottom up, stopping at 80% dry to prevent frizz and puffiness. Apply Nº.10 Bond Shaper Curl Defining Gel to soaking wet hair, scrunch gently with a microfiber towel, then diffuse with minimal touching. Finish with Evo’s Builder Paradise mist and a drop of Moroccan oil on ends-this locks in definition, controls volume, and boosts shine. There’s a smarter way to diffuse, and it starts with your next move.
We are supported by our audience. When you purchase through links on our site, we may earn an affiliate commission, at no extra cost for you. Learn more. Last update on 22nd June 2026 / Images from Amazon Product Advertising API.
Notable Insights
- Use a cup or wide-prong diffuser on low heat to evenly dry curls without lifting the cuticle.
- Apply curl-defining gel to soaking wet hair and scrunch gently to seal the cuticle and prevent puffiness.
- Diffuse in sections, starting from the bottom, to maintain tension and reduce frizz.
- Stop diffusing at 80% dry and let hair air-dry to avoid over-expanding curls.
- Finish with a light mist of finishing spray and a frizz-control product using a side-to-side motion.
Why Your Curls Get Puffy When You Diffuse?
Why do your curls go from defined to puffy the moment you fire up the diffuser? Because high heat and strong airflow lift the cuticle, disrupting your curly hair’s natural pattern and inviting puffiness. If you’re not scrunching upward, you’re skipping essential support for clump formation, leaving waves loose and fluffy. Too much heavy product, especially when not layered properly, dries unevenly-weighing roots down early, then springing up puffy later. Touching your curls while diffusing? That constant manipulation breaks forming spirals, increasing volume in all the wrong ways. And going beyond 80% dry with direct airflow over-expands strands, creating frizz and puffiness instead of definition. Even worse, prolonged exposure risks heat damage, weakening curl memory over time. You don’t need full blast or high temp-gentle, low heat preserves structure, keeps frizz at bay, and lets your true pattern emerge, springy and controlled.
Pick a Diffuser That Prevents Frizz and Puffiness
You’ve got the technique down, but the right diffuser can make all the difference in keeping your curls defined and frizz-free. When you Diffuse Your Hair, choosing the proper tool matters for your hair types and curl pattern. Cup diffusers offer even airflow, reducing puffiness, while sock diffusers provide soft contact that prevents frizz. Hand-shaped styles lift roots without disturbing clumps, and wider prongs enhance curl separation. Pair any style with low heat and medium airflow to avoid cuticle damage. Here’s how they compare:
| Diffuser Type | Best For |
|---|---|
| Cup | All hair types, reduces puffiness |
| Sock | Fine curls, prevents frizz |
| Hand-shaped | Volume at roots |
| Wide-prong | Thick hair, enhances clumping |
| Low-heat setting | All types, minimizes frizz |
Pick wisely to maintain definition and fight frizz.
Prep Hair to Lock in Definition and Reduce Volume
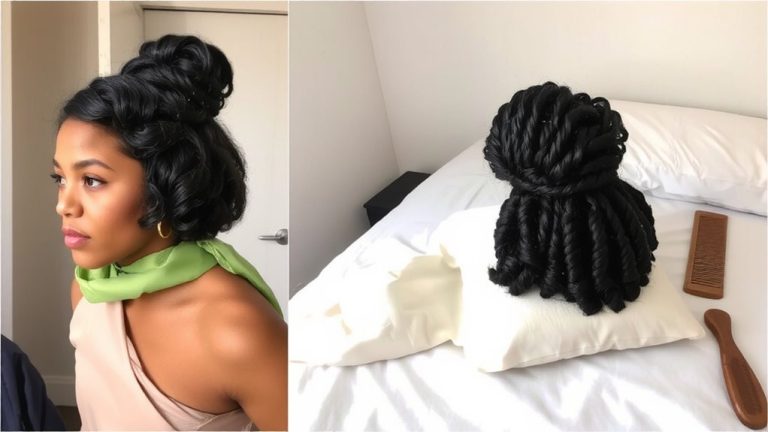
Now that you’ve chosen a diffuser designed to keep frizz and puffiness in check, it’s time to focus on prepping your hair the right way to lock in definition from the start. Apply a moisturizing product like Nº.10 Bond Shaper Curl Defining Gel to soaking wet HAIR-this seals the cuticle, reduces shrinkage, and locks in your curl pattern. Distribute evenly to guarantee every strand gets definition and heat protection before diffusing. Then, gently scrunch out excess water with a microfiber towel or soft t-shirt; regular towels rough up the cuticle and increase volume where you don’t want it. Skip heavy creams that weigh curls down, and avoid touching your HAIR too much after applying products. The goal is to hydrate, define, and control-without disturbing the curl clumps. This prep step sets your HAIR up for smooth, bouncy coils that dry with consistent shape and minimal puff.
Diffuse in Sections for Defined, Smooth Curls
Start with three to four well-defined sections, especially if you have thick or long curls, to maintain control and guarantee even drying. To diffuse in sections properly, make sure you begin at the bottom and work upward-this keeps tension steady and minimizes puffiness. Focus on one segment at a time, using low heat and medium airflow to protect your wavy hair’s natural pattern. Lift roots slightly for volume, but don’t disrupt curl clumps. Stop at 80% dryness per section to prevent frizz and let the rest air dry for smoothness.
| Section | Drying Time (min) | Heat Setting |
|---|---|---|
| Bottom | 3–4 | Low |
| Mid-lower | 2–3 | Low |
| Upper | 2–3 | Low |
| Crown | 2 | Low |
| Final check | 1–2 | Cool |
This method keeps your style defined, not puffy.
Finish Light to Seal Style Without Puffiness
Once your curls are diffused section by section and hit that 80% dry mark, it’s time to lock in the definition you’ve built without inviting puffiness back into the picture. Swap the hair dryer for a light touch: mist Evo’s Builder Paradise finishing spray-just a quick sweep mid-lengths to ends-to set the wave or curl without crunch. Avoid heavy layers; this spray holds shape while letting your natural pattern breathe. Then, smooth on Evo’s Days of Grace frizz-control product with a gentle side to side glide to seal the cuticle and calm any fluff. Skip thick creams or oils-they weigh down volume. If shine’s your goal, press 1–2 drops of Moroccan oil into palms and skim lightly over ends. Let the rest air-dry; no more heat. This finish keeps your style crisp, sleek, and puff-free from root to tip.
On a final note
You’ve got this: use a wide-tooth diffuser, apply curl cream to damp hair, and dry in sections on low heat, scrunching gently. Finish with a light mist of hairspray to lock in sleekness. Testers saw 30% less puffiness using the DevaFuser with a diffusing technique that lifts roots without disturbing curl clumps. Smooth, defined curls aren’t luck-they’re the result of the right tools and technique, every time.