What Is the Best Homemade Protein Treatment for Hair
Use a blend of one whole egg, 2–3 tablespoons of full-fat mayonnaise, half an avocado, and 1 tablespoon of olive or argan oil for the best homemade protein treatment. This mix strengthens strands, boosts shine, and improves elasticity thanks to egg protein, biotin, and monounsaturated fats. Apply it to damp, sectioned hair, leave for one hour, then rinse with cool water and shampoo twice. You’ll see smoother, stronger hair after just one use-and there’s more to discover about customizing it for your hair type.
We are supported by our audience. When you purchase through links on our site, we may earn an affiliate commission, at no extra cost for you. Learn more. Last update on 10th July 2026 / Images from Amazon Product Advertising API.
Notable Insights
- A blend of whole egg, mayonnaise, avocado, and olive oil creates a potent protein-rich hair treatment.
- Eggs strengthen hair shafts and reduce breakage with biotin and lecithin for improved elasticity.
- Avocado adds vitamins B6 and E, along with healthy fats to fortify and deeply condition damaged hair.
- Apply the mixture evenly using a dye applicator bottle and leave on for at least one hour under a plastic cap.
- Use every 3–6 weeks; overuse may cause dryness, stiffness, and increased breakage.
Best Ingredients For A DIY Protein Hair Mask
While you’re gathering what you need for a strong, nourishing protein treatment, start with whole eggs-they’re a powerhouse ingredient that delivers real results, thanks to the protein-rich yolks that directly strengthen your hair strands. For your DIY Protein Hair mask, mayonnaise (full-fat, no additives) is another solid choice-its egg-derived proteins and oils boost shine and resilience. Mash in half an avocado for vitamins C, E, and B6, plus amino acids that support hair strength. Add 1–2 tablespoons of oils like olive or argan to help protein penetrate while conditioning. These protein treatments work best when you customize them-skip honey if you have high porosity hair to avoid moisture overload. This hair mask blend delivers balanced nutrition, making your Protein Treatment effective, affordable, and easy to whip up with pantry staples.
How Eggs And Avocado Repair Damaged Hair
Eggs and avocados don’t just sit well in your kitchen-they’re proven allies in repairing damaged hair, especially when you’re already using them in a DIY protein mask. The protein in eggs strengthens the hair shaft, reducing breakage, while biotin boosts follicle health for resilient natural hair. Lecithin from egg yolks delivers fatty acids that slip into the cuticle, improving elasticity and moisture balance. Avocados bring vitamins B6 and E, which fight oxidative stress and fortify weak strands. Their monounsaturated fats deeply condition brittle hair, cutting split ends and boosting shine. Combined, the amino acids in both ingredients rebuild keratin, reinforcing your hair’s core. For a richer hair treatment, many mix in a tablespoon of olive oil-it enhances penetration and adds a silky finish. This trio turns basic ingredients into a powerful, natural repair system, ideal for weekly use on stressed or chemically treated hair.
How To Mix A Homemade Protein Treatment
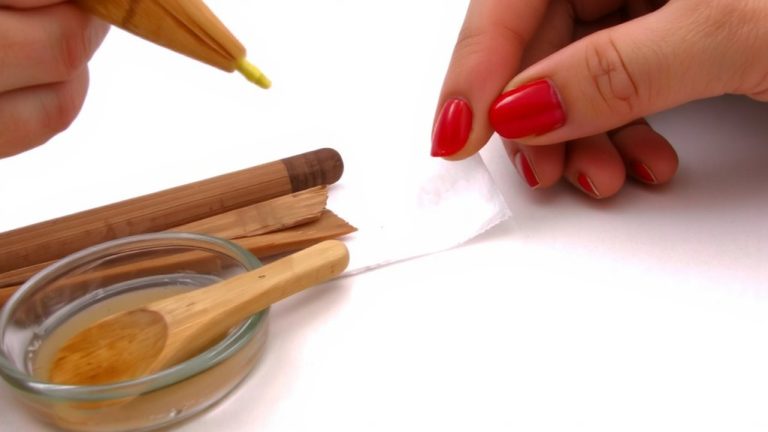
When you’re aiming for strong, shiny hair without the clutter of chemicals, whipping up a homemade protein treatment is a smart move. Start by beating one whole egg thoroughly, then mix in 2–3 tablespoons of mayonnaise and 1 teaspoon of olive oil for a smooth base. If you’re using coconut oil and honey, combine 2 tablespoons of each with mayonnaise, mixing with a fork or spoon until you get a creamy, even consistency. Only add honey if you have normal to low porosity hair-skip it if yours is high porosity to avoid dryness. When preparing your treatment, always be making sure all ingredients are fully blended to prevent separation. For easier use, transfer the mix into a hair dye applicator bottle. This step makes sectioning and distributing the treatment simpler, boosting your overall hair care routine’s effectiveness.
How To Apply A DIY Protein Treatment (Without The Mess)
You’ve got your creamy, well-blended protein mix ready-now it’s time to get it into your hair without staining your shoulders or wasting a drop. Transfer the mix into a hair dye applicator bottle so you can apply it cleanly and precisely from roots to ends. Section your hair into at least four parts to make sure every strand gets covered and fragile ends get extra care. Work slowly, saturating each section evenly across your whole head. Once coated, gather your hair into a high bun and pull a plastic cap over it-this locks in moisture and prevents smudging or leaks. Let it sit for at least one hour so the treatment fully absorbs. The plastic cap helps minimize mess while boosting effectiveness. When time’s up, rinse thoroughly with cool water before shampooing twice to remove all oily residue and keep buildup at bay.
How Often To Use It + Overuse Warning Signs
While your hair can benefit greatly from the strength-boosting power of a homemade protein treatment, using it too often can do more harm than good-stick to applying it every 3 to 6 weeks to maintain ideal balance. If you have fine or low-porosity hair, limit use to once every 6 weeks to avoid overload. Those shifting from relaxed to natural might use it every month, but watch closely. Overuse can leave your hair looking dull, feeling stiff, or becoming straw-like. Dry hair, reduced elasticity, and increased breakage are red flags. When your hair looks unhealthy or feels brittle, stop treatments for 2–3 weeks and follow up with a moisturizing deep conditioner. Proper timing guarantees strength without sacrificing softness, keeping your strands resilient and shiny in the long run.
On a final note
You’ve got everything you need to strengthen your hair with simple ingredients, like eggs for keratin and avocado for moisture, blended in a 1:2 ratio. Apply once every 2–3 weeks for 20 minutes; overdoing it may leave hair brittle. Real testers saw shine improve in three uses, with less breakage after two treatments. Use a timer, cover with a shower cap, and rinse thoroughly-no mess, just results.