How to Fix Cloudiness in Clear Gel After Improper Curing Sequences
Check your lamp first-weak UV output from older bulbs or low-powered units causes cloudiness, so upgrade to a 36W–48W LED/UV combo for full curing. Don’t wipe too soon; wait 20 minutes post-cure to let sticky layers off-gas. Use 91% isopropyl alcohol carefully-it can react with uncured gel and create haze. Switch to a no-wipe top coat to skip the wipe step entirely. Warm your gel in a 70–75°F water bath and work in low humidity to prevent moisture trapping. If it’s still foggy, strip it and rebuild with thinner layers, fully curing each for 90 seconds. Seal with a no-wipe top coat for lasting clarity.
We are supported by our audience. When you purchase through links on our site, we may earn an affiliate commission, at no extra cost for you. Learn more. Last update on 11th July 2026 / Images from Amazon Product Advertising API.
Notable Insights
- Replace old bulbs and use a high-powered 36W+ LED/UV combo lamp to ensure full curing and prevent cloudiness.
- Cure each gel layer for at least 90 seconds; perform multiple cycles for thick applications to avoid under-curing.
- Wait 20 minutes after final cure before wiping with 91% isopropyl alcohol to allow off-gassing and prevent haze.
- Apply a no-wipe top coat to eliminate alcohol wiping and reduce risk of milky streaks from uncured gel.
- Warm gel to 70–75°F and control humidity below 50% to prevent moisture trapping and flawed polymerization.
Check Your Curing Lamp for Cloudy Gel
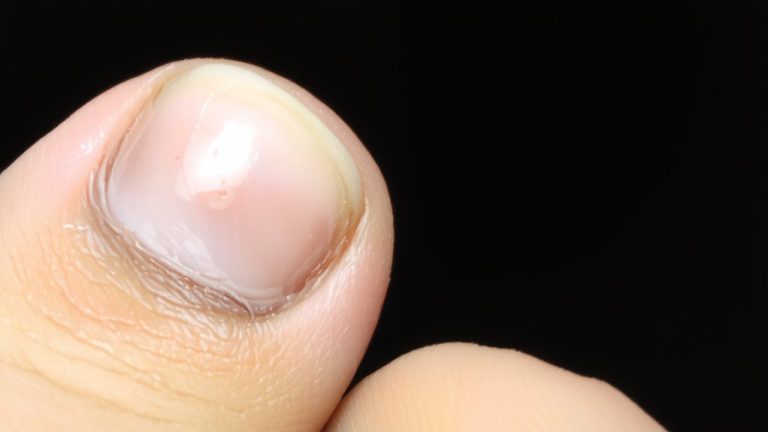
If your clear gel turns out cloudy, the first thing to check is whether your curing lamp is up to the task, because not all lamps deliver the right kind of power for complete curing. Weak UV output or mismatched wavelength can leave you with a milky appearance and sticky layer, signs of improperly cured gel. Even after alcohol wiping with 91% alcohol, cloudiness lingers if the gel never fully hardened. That’s often due to poor lamp efficacy, especially if bulbs are older than 6 months and have degraded UV exposure. A non-high-powered curing lamp might need multiple 90-second cycles to fully cure thick builder gel. Test your lamp’s performance: cure a small sample for 2 minutes. If it’s still tacky or cloudy, your lamp isn’t cutting it. Upgrade to a reliable LED/UV combo unit with proven UV output to prevent cloudy gel every time.
Fix Under-Cured Gel Before Wiping
While your builder gel might feel dry to the touch, don’t wipe away the sticky layer just yet-rushing this step can lock in cloudiness if the gel’s still under-cured beneath the surface. Your UV/LED lamp needs to deliver full polymerization through multiple 90-second curing cycles, not just a single short blast that leaves monomers trapped. If the layer stays tacky or develops a cloudy finish, it hasn’t cured properly. Stacking new gel over under-cured layers only worsens the problem, trapping sticky resin and blocking light penetration. Always guarantee each coat fully cures before adding the next. After the final cure, wait 20 minutes to let residual components off-gas. Then-and only then-use 91% isopropyl alcohol to wipe the tacky layer clean, preserving clarity and avoiding a milky mess.
Stop Cloudiness From Alcohol Wipes
Milky streaks after your alcohol wipe? You’re likely battling cloudy resin from alcohol wipes reacting with a sticky layer left by improper curing. That haze forms when 91% isopropyl alcohol disrupts uncured gel beneath the surface. To avoid it, switch to a no-wipe top coat-it skips the wipe step entirely and prevents cloudiness. If you must wipe, guarantee complete curing with a high-powered UV/LED lamp (36W or higher) to eliminate the sticky layer. Some milky finish may still appear but often fades after 20 minutes of air-drying as solvents evaporate.
| Issue | Cause | Solution |
|---|---|---|
| Cloudy resin | Alcohol wipes on uncured gel | Use no-wipe top coat |
| Haze | Low-powered lamp | Upgrade UV/LED lamp |
| Milky finish | Sticky layer remains | Guarantee complete curing |
| Residual cloudiness | Improper curing | Air-dry 20 minutes |
Apply Builder Gel Over Glitter Without Haze
When you’re layering builder gel over chunky glitter, sealing the texture properly is key to avoiding a hazy finish, so start by applying a no-wipe top coat over the sticky layer-this blocks alcohol from disrupting the gel-polish interface during cleanup. Then, apply thin, even layers of builder gel to prevent light scattering that leads to a cloudy appearance. Cure each layer for at least 90 seconds under a powerful UV/LED lamp (36W–48W) to guarantee full polymerization and avoid a milky texture. Rushing curing causes incomplete hardening, which invites haze. Once fully cured, gently wipe with 91% isopropyl alcohol-doing it too soon leaves the surface sticky or cloudy. Seal glitter edges completely with the builder gel, extending slightly onto the natural nail for clarity at stress points. A smooth, clear finish is achievable when you control the curing process and protect the gel layers from contamination.
Seal for Shine With a No-Wipe Top Coat
A flawless finish starts with the right sealant, and that’s where a no-wipe top coat makes all the difference. You skip the alcohol wipe, which means no risk of cloudiness from disrupting uncured gel layers. Traditional top coats leave a sticky layer, requiring cleanup that can lead to hazing, especially under weak UV lamp output. But with a no-wipe top coat, you seal for shine without residue, even over textured glitter. It cures fully in one 30- to 60-second cycle, cutting time versus multiple 90-second cures. There’s no sticky layer to remove, so you avoid the milky finish caused by improper curing or premature drying. Testers confirm: using a no-wipe top coat delivers a reliable high-gloss finish and prevents alcohol wipe–induced hazing. It’s the smart, fast fix for flawless, streak-free cured gel every time.
Prevent Milky Nails: Warm Gel and Control Humidity
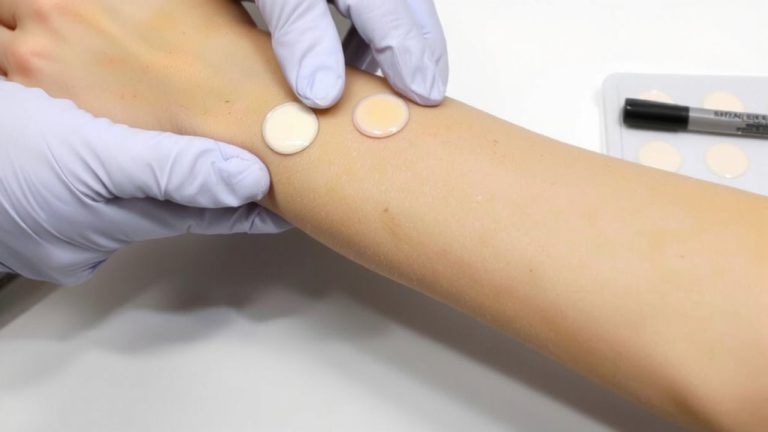
You’ve sealed with a no-wipe top coat for that high-gloss, streak-free finish, but cloudiness can still creep in if your gel’s too cold or the air’s too damp. To prevent milky nails, warm up resin by placing sealed gel bottles in a warm water bath at 70–75°F for 5–10 minutes-this stabilizes the resin and hardener, reduces viscosity, and prevents microbubbles. Always store gels at room temperature to avoid temperature fluctuations that disrupt consistency. Work in a warm, climate-controlled space with consistent temperature, ideally matching the gel’s correct temperature. Work in a dry environment with humidity below 50% to stop moisture from interfering during cure. When the air’s too moist, it reacts prematurely with the formula, causing haze. Maintaining these conditions guarantees smooth, crystal-clear results every time-no guesswork, just precision.
When to Strip and Reapply Your Gel Coating
Why does your gel still look foggy even after curing and wiping it down? That cloudy appearance likely means incomplete curing, often from improper curing times or using a lamp without enough power. If you’re seeing a milky finish even after 20 minutes of air drying, trapped moisture or a flawed chemical reaction may have occurred. In such cases, you’ll need to strip and reapply the gel coating. This is especially true if you applied builder gel over a sticky layer without proper curing-compromised adhesion leads to haze. Thin layers cured in 90-second cycles under weak lamps can also cause permanent cloudiness. Remove the old gel completely, then reapply with a no-wipe top coat. It’s lamp-compatible, avoids sticky residue, and delivers a crystal-clear finish without post-cure wiping.
On a final note
You’ve got this-cloudy gel happens, but it’s fixable. Check your lamp’s output (replace bulbs every 6 months), guarantee each layer cures fully (30 seconds per 0.5mm thickness), and skip alcohol wipes on sticky layers. Warm gel before use, work in low humidity, and seal glitter layers with no-wipe top coats. When in doubt, strip and rebuild-it’s faster than hiding flaws. Testers saw shine last 3 weeks with these steps.