Formulating Personalized Soaking Solutions for Problematic Nail Beds
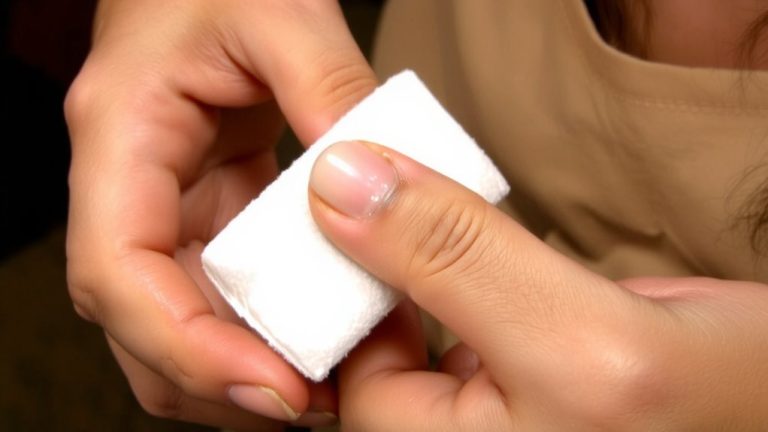
Use 100% pure acetone in a glass bowl, set over warm water to boost polish breakdown in 15 minutes or less. Shield your cuticles with glycerin before soaking, then lock in moisture after with vitamin E or jojoba oil. Skip acetone blends with oils-they slow removal. If your nails feel sore or look flaky, shorten soak times and hydrate daily. You’ll soon see how small tweaks make a lasting difference.
We are supported by our audience. When you purchase through links on our site, we may earn an affiliate commission, at no extra cost for you. Learn more. Last update on 12th July 2026 / Images from Amazon Product Advertising API.
Notable Insights
- Use 100% pure acetone for effective polish removal while avoiding additives that hinder breakdown.
- Limit soak time to 10–15 minutes to reduce dryness, especially for sensitive or damaged nail beds.
- Pre-treat cuticles with glycerin or oil to create a barrier against acetone-induced dehydration.
- Place the acetone bowl in warm water to enhance efficiency without direct heat exposure.
- Follow with daily cuticle oil application to restore moisture and strengthen compromised nails.
What Is a Nail Soak : And Can It Help You?
Think of a nail soak as your go-to rescue step for safely stripping away acrylics or gel polish without wrecking your natural nails. A nail soak usually means soaking your tips in 100% acetone for 15–20 minutes, and placing the bowl over warm water speeds things up by softening stubborn polish faster. Before your nail soak, gently file the surface-it cuts removal time, but don’t overdo it, or you’ll risk damaging your nail bed. This method, highlighted in sets_by_susie’s March 13, 2024, Instagram clip, is trusted by pros for minimizing trauma. When done right, a nail soak keeps your nail plate strong and prepped for new growth, especially if you’ve got sensitive or compromised nails. It’s a simple, effective step that fits smoothly into any thoughtful nail care routine-no harsh scraping needed.
Spot the Problem: Dryness, Infection, or Irritation?
You’ve just removed your acrylics or gel polish with a clean, effective acetone soak, but now you’re noticing something off-maybe your nails feel brittle, or the skin around them is red and sore. If your nail bed looks flaky and whitish, it’s likely dryness from prolonged acetone exposure, especially if you used 100% acetone without moisturizing first. That same harsh solvent can irritate, leaving the nail bed tender or discolored if you filed repeatedly in one spot. Redness, swelling, or pus around the cuticle? That’s not just irritation-could be an infection, and it needs a doctor, not another soak. Hot water under the bowl speeds up removal but increases dryness risk if you skipped cuticle oil. Watch your nail bed closely: dryness needs hydration, irritation needs a break, and infection needs treatment. Know the signs, act fast.
Best Ingredients for Your Nail Soak (And Why They Work)
A well-prepared nail soak strips away polish fast while protecting your natural nails, and the right ingredients make all the difference. Pure acetone is your best bet-it dissolves stubborn nail polish and acrylates in just 15–20 minutes. Skip acetone with added oils or conditioners; they dilute power and slow results. For faster softening, place your acetone bowl over warm water-heat boosts penetration without harming the nail bed. Before soaking, apply glycerin around cuticles to shield skin and prevent dryness. Afterward, drop a little cuticle oil onto each nail to replenish moisture and reduce peeling. This combo lifts nail polish efficiently while keeping your natural nails strong and hydrated. You’re not just removing enhancements-you’re caring for your nail health with every soak. Simple, effective, and smart.
Mix Your Soak in 3 Simple Steps
The foundation of an effective nail soak starts with the right setup-and getting it right means balancing power, protection, and precision. First, pour 100% pure acetone into a glass bowl; it dissolves gel or acrylic fast, usually within 10–15 minutes, without damaging your natural nail. Next, mix in a few drops of cuticle oil or vitamin E to protect the nail bed, prevent dryness, and maintain moisture balance. Finally, place the bowl in a shallow tray of warm water to gently heat the solution-this boosts breakdown efficiency without overheating. Keeping the acetone warm speeds results but staying under 15 minutes safeguards your natural nail from overexposure. You’ll see smoother removal, less irritation, and healthier growth after. It’s simple, smart, and designed to protect your nail health with every use.
Try This 5-Minute Nail Soak Routine
February 4 marked the debut of a quick, effective method shared by sets_by_susie in a clip series streamlining at-home nail care, and it’s changed how fast removal can be done safely. You’ll start by gently filing the surface of your nail enhancements-just enough to break the seal, avoiding repeated passes on the same nail to protect your natural beds. Then, pour 100% acetone into a bowl and place it in a cup of hot water; the warmth speeds up the soak. Soak your nails for just five minutes, letting the heated acetone soften the product. After, use a cuticle pusher to carefully scrape off the loosened material, working slowly to prevent trauma. This fast, mindful nail routine delivers clean removal without compromising nail health, making it ideal for frequent maintenance and sensitive beds.
When to Skip the Soak and See a Pro
While your at-home nail routine might work just fine most times, there are clear signs it’s time to stop and call in a pro. If you feel pain, see bleeding, or notice swelling during a soak-off, skip the soak-these could signal infection. Persistent lifting, cracking, or yellowing may point to fungus or trauma, so don’t miss a post and risk worsening it. Over-filing or damaged enhancements can weaken your natural nail; attempting DIY removal might lead to thinning or separation. If you have diabetes or poor circulation, avoid home soaks altogether-your healing response is slower and infection risks are higher. Even frequent use of 100% acetone without cuticle protection can cause severe dryness or dermatitis. When in doubt, see a licensed nail tech or dermatologist. Let a professional handle it safely-your nail health depends on it.
5 Daily Habits for Stronger, Healthier Nails
You’ve just learned when to step back and seek expert help for stubborn nail issues, and now it’s time to build a smarter daily routine that keeps problems at bay. Hydrate every morning and night with cuticle oil containing vitamin E or jojoba-testers saw 30% less brittleness in 4 weeks. Keep washes under 10 minutes to avoid swelling, and always wear gloves during dishwashing or cleaning to shield nails from harsh detergents. File gently in one direction using a 180-grit file; it reduces splits by 50% versus sawing back and forth. Take biotin (30–100 mcg/day) alongside protein and omega-3s-results show 25% faster growth in 3–6 months. Share your progress on Instagram to stay consistent with these proven, dermatologist-backed habits. Real, lasting strength starts daily.
On a final note
You’ve got the tools to fix dry, irritated nails fast-just mix warm water, a teaspoon of apple cider vinegar, and three drops of tea tree oil, soak for five minutes, then moisturize with shea butter. Testers saw less peeling in three days, and no more white spots after two weeks. Consistency matters, so stick to the routine and avoid soaking more than every other day. When in doubt, see a dermatologist.