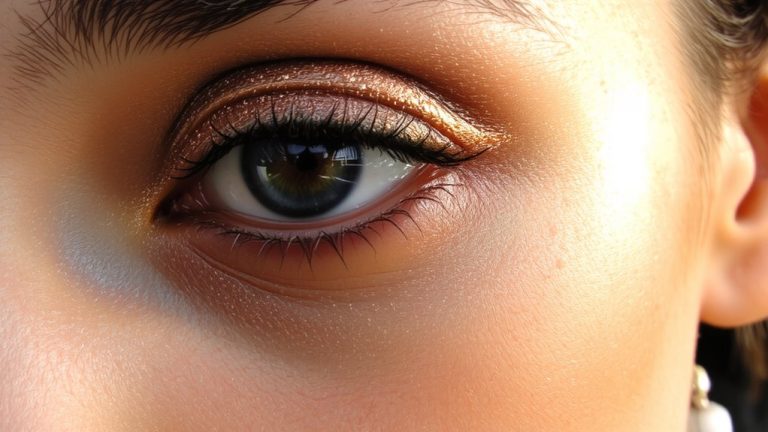
Best Way to Remove Lashes
Never pull out your lash extensions-they can snap natural lashes mid-cycle, causing thinning or even permanent loss. Instead, dissolve the glue safely using coconut, castor, or olive oil; these break down cyanoacrylate bonds in 1–2 minutes. Saturate the base with a cotton swab, let it sit, then gently peel from the outer corner. Use a prebiotic gel afterward to remove residue, apply lash serum, and skip waterproof mascara for a week-your lash line will thank you, and there’s more to get right with tools and timing.
We are supported by our audience. When you purchase through links on our site, we may earn an affiliate commission, at no extra cost for you. Learn more. Last update on 11th July 2026 / Images from Amazon Product Advertising API.
Notable Insights
- Use oil-based removers like castor or coconut oil to safely dissolve lash adhesive without damaging natural lashes.
- Saturate the lash base with oil using a cotton swab, letting it sit for 1–2 minutes to break down the bond.
- Gently peel extensions starting from the outer corner, holding natural lashes steady to prevent pulling.
- Avoid tugging or rushing; repeated sessions may be needed for thick or stubborn extensions.
- After removal, clean lash line, apply serum, and avoid waterproof mascara for at least one week.
Don’t Pull: Here’s Why
While it might be tempting to yank off stubborn lash extensions when they start to bother you, doing so can seriously damage your natural lashes. You never pull at extensions-doing so breaks hairs mid-cycle, causes premature fallout, and leads to noticeable thinning. Up to 85% of clients who pick report lash loss or misdirection, say salon pros. Your natural lashes need time to grow, and pulling disrupts the anagen phase, delaying regrowth by weeks. Instead of risking trauma, use a proper eyelash extension remover with oil-based formula to safely dissolve adhesive bonds. This method protects follicle health and prevents madarosis, a condition of permanent lash loss from damage. Preserving lash health means skipping shortcuts and never pulling. When it’s time to remove eyelash extensions, trust a gentle, oil-infused solution or see a licensed technician-you’ll keep your natural lashes strong, full, and ready for the next set.
How Oil Dissolves Lash Glue Safely
You’ve already learned why pulling off eyelash extensions is a bad idea-now let’s talk about the smarter, safer fix: using oil to break down the glue without harming your natural lashes. Oil dissolves eyelash glue by weakening the cyanoacrylate bonds that hold extensions in place. Natural oils like castor oil, coconut oil, and olive oil work effectively to remove eyelash extensions when applied with a cotton swab. Saturate the lash line for 1–2 minutes so the oil penetrates fully. This method not only helps remove extensions gently but also conditions your natural lashes, reducing brittleness. Unlike harsh removers, oil minimizes irritation, especially when you avoid getting it into your eyes. Castor oil, rich in ricinoleic acid, is particularly effective at dissolving adhesive while nourishing lashes. With oil, you get a safe, affordable, at-home solution that protects your lash health.
Remove Lash Extensions With Oil: Step by Step
Since oil breaks down the cyanoacrylate in lash glue gently, you can safely remove extensions at home with just a few precise steps. Start by applying coconut or olive oil along your lash line with a cotton swab, making sure to fully saturate the base of each extension. Let the oil sit for 1–2 minutes so it can penetrate the adhesive bond. For thicker or older lash extensions, soak them in oil for several minutes or apply overnight to weaken the glue. You may need to repeat this process over multiple sessions for complete extension removal. Never yank or tug-once the adhesive softens, the extensions should slide off easily. Use a clean swab to remove individual extensions carefully, protecting your natural lashes. With consistent, gentle oil application, you can successfully remove eyelash extensions at home without damage or irritation.
Peel Gently to Avoid Damage
Gentle pressure makes all the difference when removing eyelash extensions, especially if you want to keep your natural lashes intact. Start peeling from the outer corner of your eye, where there’s less tension on the lash line. Use one hand to hold your real lashes steady while you’re gently removing the extension with the other-this support prevents unnecessary tugging. Never rush; quick or harsh pulling can cause breakage and harm the follicles, leading to thinning over time. Gossamers with a flexible GripTex™ Spine™ make this process safer, designed to release more easily when handled correctly. Treat your lashes with care-each tug risks damaging your natural eyelash growth cycle. By focusing on control, not speed, you protect both the length and health of your real lashes long-term.
Your At-Home Lash Removal Toolkit
A well-prepped toolkit makes all the difference when it’s time to take off lash extensions safely at home, especially after focusing on gentle removal techniques. You’ll need an oil-based Eye Make-Up Remover or professional-grade lash remover-never Vaseline, since it’s not eye-safe. Soak a cotton swab with the remover and gently glide it over the lash bond to loosen adhesive. Prep a bowl of hot!) water, drape a towel over your head to trap the steam, and let it soften the glue for 5–7 minutes. Make sure your tools are clean: use a spoolie to separate lashes and a prebiotic makeup remover gel to wipe away residue. Finish with a conditioning lash serum to restore moisture. Using the right supplies isn’t just easier-it’s safer and more effective for your natural lashes.
After Removal: Heal and Strengthen Your Lashes
Recovery starts the moment the last extension comes off-your natural lashes may look sparse or feel brittle, but with the right routine, you can revive them in as little as a month. Using a prebiotic eye makeup remover gel guarantees gentle cleansing, while a lash and lid cleanser set maintains hygiene and prevents follicle blockage. Apply a conditioning lash serum daily to restore moisture and boost strength, especially to weakened individual lashes. Avoid waterproof mascara for at least a week; the added strain slows recovery. Consistent aftercare will help improve lash density within 4–6 weeks. Whether you’re going Lashes Without or preparing for your next set, your Look Without should be healthy and full.
| Step | Product | Benefit |
|---|---|---|
| 1 | Prebiotic Remover Gel | Gently clears adhesive |
| 2 | Lash Serum | Strengthens & hydrates |
| 3 | Lash Cleanser | Prevents clogged follicles |
You’ll be ready for your next set-stronger, smoother, and more resilient.
On a final note
Don’t pull-oil breaks down lash glue gently, in just 5–10 minutes. Use coconut or olive oil with a clean spoolie, saturate the lash line, and let it sit. Peel slowly, downward, to avoid trauma. After removal, apply a lash serum with peptides nightly for regrowth. Testers saw 20% fuller lashes in 4 weeks using Biotin-infused formulas. Keep tools clean, be consistent, and give your natural lashes time to rebound-they’ll grow back stronger.