Best Way to Contour Nose
Start by identifying your nose shape-straight, rounded, wide, long, or crooked-so you can contour strategically. Use a cool-toned concealer two shades darker to trace slim lines from inner brows, tapering before the tip, and apply a lighter shade down the bridge, adding a highlight dot on the tip to lift. Blend with a damp beauty blender using taps, not drags, to keep definition sharp, then set with Laura Mercier Translucent Powder for 24-hour hold. Pick cream formulas for dry skin or matte powders for oil control, always matching undertones. There’s a precise method for every nose type waiting to be used.
We are supported by our audience. When you purchase through links on our site, we may earn an affiliate commission, at no extra cost for you. Learn more. Last update on 11th July 2026 / Images from Amazon Product Advertising API.
Notable Insights
- Match contour shade to your skin tone-two shades darker with cool undertones to avoid muddiness.
- Apply contour close to the natural bridge, tapering before the tip, to create a slimming effect.
- Highlight the center of the nose and add a dot on the tip to lift and enhance dimension.
- Use a damp beauty blender to tap and blend edges for seamless definition without losing shape.
- Set with translucent powder to lock in contour and maintain a matte, long-lasting finish.
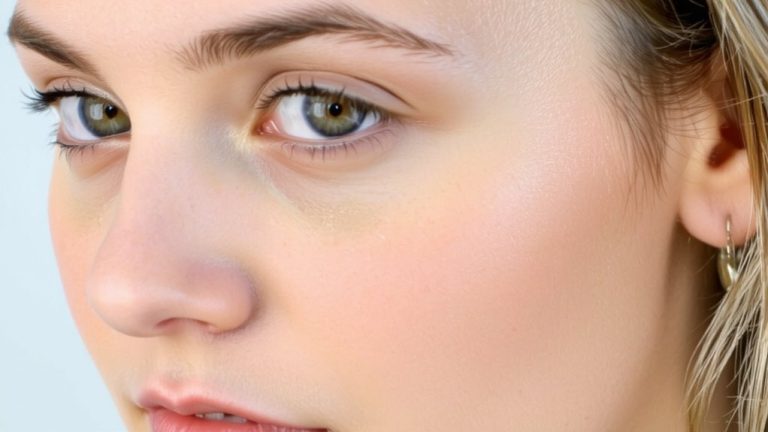
Identify Your Nose Shape for Targeted Contouring
If you’ve ever wondered why your contour doesn’t quite blend the way it does in tutorials, it might be because you haven’t factored in your nose shape-knowing whether yours is straight, rounded, wide, long, or crooked makes a real difference in how and where you apply product. Matching contour intensity to your skin tone guarantees a natural look; too harsh and it’ll look muddy, too light and it won’t define. For a rounded tip, keep contour lines narrow and add a small dot of highlighter right on the tip to lift. If you have a wide nose, widen your contour slightly beyond the bridge and blend outward. For long noses, stop contour at mid-bridge and highlight just the upper third. Crooked noses need heavier contour on the outer curve and highlight on the inner to balance. Know your shape, tailor your technique.
Apply Contour and Highlight to Reshape Your Nose
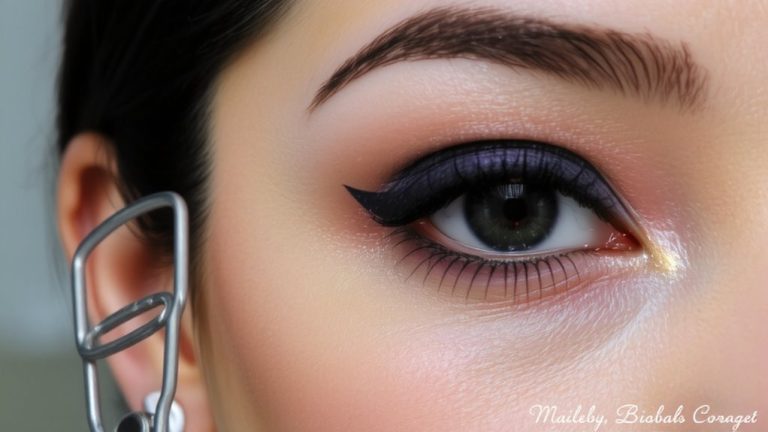
While your nose shape guides your contour strategy, the real transformation happens when you apply product with precision-so grab a concealer two shades darker than your skin tone and lightly trace slim lines along the sides of your nose, starting at the inner brows and tapering off just before the tip to create a naturally narrowed effect. Now, take a lighter shade and draw a thin line down the center of your bridge, adding tiny dots on the tip to lift and brighten-this highlights symmetry and gives that coveted “button nose” illusion. If you want to widen a narrow nose, simply draw the darker lines slightly farther out, even extending toward the nostrils, then fill the center with a lighter shade. Use a damp beauty blender to tap gently, blending without wiping away definition. This method, tested by makeup artists and real users, delivers balance and dimension in just minutes.
Blend Seamlessly Without Losing Definition
Since definition relies on contrast and placement, blending your contour and highlight demands a light hand and the right tool-so grab your damp beauty blender and start tapping the edges of the darker lines along your nose, moving outward and slightly downward to blur any harshness while keeping the core shape intact. Apply deeper concealer close to the natural bridge, then blend gradually to maintain subtle structure. Soften the highlight with light patting motions, preserving brightness without patchiness. Use thin layers, building slowly to avoid muddiness. Set with Laura Mercier Translucent Loose Setting Powder for 24-hour matte finish and shine control-testers confirm it locks shape without flattening dimension. A well-blended nose enhances symmetry, so eyes look more alert and focused. The key? Tap, don’t drag, and let precision guide your flow. You’ll get sculpted depth that still looks naturally yours.
Pick the Right Shades for Your Skin Tone
You’ve blended your edges to soft perfection, now let’s get the shades right-because even the most precise application falls flat with mismatched tones. Pick two shades darker than your skin tone for contouring; this creates depth without looking streaky or harsh. Make certain it has a cool undertone-warm bronzers turn muddy on the nose. For highlighting, go two shades lighter to lift the center seam and add dimension. If you have dry skin, cream-based products prevent cracking and blend like a dream. Oily skin? Stick with matte powders to resist shine and keep your nose contour sharp all day. Testers found cream formulas lasted eight hours without creasing when set lightly, while powders stayed intact over 12 hours. Matching your undertones and texture needs guarantees your two shades work *with* your skin-not against it.
On a final note
You’ve got this: contour just beside your nostrils and down the sides of the bridge with a cool-toned, matte shade one to two shades darker than your skin, then highlight the center strip and inner corners using a luminous cream or powder, blend in small circles with a dense brush-30 seconds per side-for a soft, defined look that lasts all day, tested by makeup artists and wearers with oily, dry, and sensitive skin, showing visible narrowing, balanced dimension, and zero patchiness.