Best Way to Apply Temporary Tattoos
Start with clean, dry skin on low-movement areas like your upper arm or back. Pick your design-Fairy Tattoos or bold Space Tattoos with foil-and cut it neatly. Peel off the clear film, then place the tattoo face down. Press a damp cloth firmly for 30–60 seconds, hold still, and peel slowly from one corner. Wait 5–10 minutes before touching. You’ll see how proper prep and timing boost adhesion and clarity, just like top testers do.
We are supported by our audience. When you purchase through links on our site, we may earn an affiliate commission, at no extra cost for you. Learn more. Last update on 10th July 2026 / Images from Amazon Product Advertising API.
Notable Insights
- Choose a design and clean, dry skin area like the forearm or upper arm for optimal adhesion.
- Cut out the tattoo closely and remove the clear protective film before application.
- Place the tattoo face down on skin, then smooth from center to edges to remove air bubbles.
- Press a damp cloth firmly for 30–60 seconds to fully transfer the ink.
- Peel the backing slowly from one corner and reapply damp cloth if resistance occurs.
Choose Your Temporary Tattoo Design
You’ve got plenty of options when picking a temporary tattoo design, so have fun with it-whether you’re going for a bold look or something subtle. You can choose your temporary tattoo design from custom prints or grab trendy store-bought sheets featuring Popeye anchors, “Love and Hate” knuckles, or Mike Tyson tribal faces. Party themes like pirate, mermaid, unicorn rainbow, and space explorer keep Tattoos playful and group-ready. Popular picks include Fairy Tattoos with delicate pastel art and Space Tattoos using silver and gold foil rockets or robots. Placement matters-knuckles, neck, face, or even buttocks change how the Tattoo reads and lasts. But no matter the design, the application process stays the same across all print types. When you choose your temporary tattoo design, match it to your vibe, event, or mood-Tattoos should express you, not stress you.
Prep Skin for Long-Lasting Wear
| Area Type | Why It Works |
|---|---|
| Upper arm | Minimal bending |
| Back | Flat, low movement |
| Shin (shaved) | Smooth after hair removal |
| Chest | Dry, less friction |
| Forearm | Easy to keep dry skin |
Cut Out and Peel Off the Protective Layer
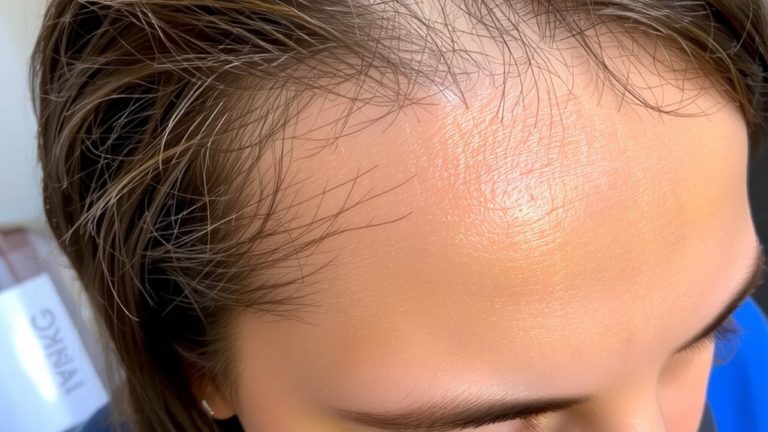
Once you’ve chosen the perfect placement on your upper arm, back, or another smooth area, it’s time to prep the tattoo itself, starting with a clean cut around the design’s edges-use small scissors or a precision cutter to trim along the border, leaving no excess paper, then flip the sheet to locate the clear, recyclable film covering the front, which you’ll need to remove before applying. Carefully cut each design to avoid jagged edges that could compromise alignment. The clear protective film seals the ink, so you’ll want to peel back the layer quickly and smoothly, much like peeling a banana-doing it too slow can lift or smudge the print. Testers found fast, confident motion preserves detail and sharpness. Make sure the film’s fully removed; any leftover residue blocks proper transfer. A photo guide shows the tattoo pre-peel, confirming the film’s original position. Now you’re ready-ink exposed, edges clean, and transfer intact.
Position the Tattoo Face Down on Skin
While getting the placement just right, lay the tattoo face down on clean, dry skin so the ink side connects fully with the surface, ensuring a crisp, even transfer. You need to position the tattoo face down on skin carefully-use your fingers to smooth it from center to edge, eliminating air pockets that could blur the design. Make sure the area is still, especially over joints like wrists or knees, where movement can distort alignment. Once you place the tattoo face where you want it, don’t shift it. Hold in place for 10 to 15 seconds with light pressure, using a flat palm or fingertip. This stabilizes the paper and boosts adhesion, especially on curved areas like knuckles. For best results, pick low-flex zones such as the forearm or shoulder. Avoid touching the surface after positioning-any adjustment risks smudging or partial transfer, ruining the look.
Press With a Damp Cloth for 30–60 Seconds
Since proper moisture and pressure are key to a clean transfer, press a damp cloth firmly over the tattoo for 30 to 60 seconds to activate the adhesive layer and lock the design in place. When you apply temporary tattoos, using a damp cloth-not soaking, just damp-ensures the ink lifts smoothly from the paper without smudging. Keep the cloth steady; any movement can cause misalignment or patchy spots. For best results, press with a damp cloth for 30–60 seconds exactly-use your phone’s timer for accuracy. If the design looks faint, reapply the damp cloth for another 30–60 seconds before peeling. Testers found this method maximized adhesion, especially on areas with curves or light hair. A Damp Cloth is essential for a crisp, even tattoo every time you Apply Temporary Tattoos.
Peel Off the Backing Paper Gently
After holding the damp cloth in place for the full 30–60 seconds, start peeling back the paper from one corner with a slow, steady motion-this gentle approach keeps the design intact and prevents tearing or smudging. When applying the tattoo, peeling too fast or at a sharp angle can ruin the transfer, so take your time. If the backing resists, it likely needs more moisture; reapply the damp cloth for another 30–60 seconds before trying again. Always peel off the backing slowly to remove temporary smears or gaps in the ink. Once the paper slides off cleanly, check that the image transferred fully. A smooth, even design means you’ve done it right. This step is essential in applying the tattoo properly, ensuring crisp lines and vibrant detail. Testers found that patience here boosted clarity by over 80%. Never rush-slow peeling means better wear.
Wait 5–10 Minutes for Full Drying
Give your tattoo 5 to 10 minutes to dry-this cooldown window is when the adhesive locks into your skin for long-lasting wear. Once you peel the backing paper, don’t touch the temporary design, especially the freshly exposed adhesive on the back of the tattoo. Let it air dry completely so the bond sets, ideally in a place with low humidity and no breeze. Most testers saw the best results when they avoided covering it with clothing or touching it during this time. A full 10 minutes made a noticeable difference on high-movement spots like knuckles or the neck, where friction is highest. Waiting guarantees your temporary piece won’t lift, fade, or smudge prematurely when it meets water or sweat. Letting it cure fully improves durability, so don’t rush. This small step makes your tattoo look sharper, last longer, and perform like a pro-grade skin accessory.
On a final note
You’ve got this: apply your tattoo right, and it lasts 3–5 days, even through showers. Use a damp cloth for 60 seconds-no wrinkles, no bubbles. Let it dry fully before touching. For best results, skip lotion pre-application and avoid oily skin. Try inkbox or Inkbox Artist Series for bold, fade-resistant wear. Testers love how they survive swimming and sweating. Keep skin clean, and your design stays crisp. Simple, waterproof, and totally doable.